Building your own website from scratch can seem daunting, but with the right tools and a clear roadmap, it’s a rewarding experience that puts you in full control. By combining the power of a Google Cloud Virtual Machine, the stability of Ubuntu Linux, and the flexibility of the Apache web server, you’re creating a professional and scalable foundation for your project. This guide will walk you through the entire process, from setting up the server to getting your site live and secure. We’ll cover every step, using the domain **it-india.net** as our example, to ensure you can follow along and build your first website with confidence.
This process gives you more flexibility than traditional shared hosting and helps you understand the core components of web hosting. For more on Google Cloud’s overall security, you can refer to their official security overview.
Step 1: Get Your Server Ready
Before we begin, you need a running Ubuntu server on Google Cloud. If you haven’t already, refer to our previous guide, A Beginner’s Guide to Launching a Server on Google Cloud, to get your Virtual Machine (VM aka VPS / Server) provisioned and running. It is also critical that you have taken the initial steps to secure your server, as detailed in our article, Securing Your Fresh Ubuntu Server on Google Cloud.
Ensure you are logged in to your server as a non-root user with `sudo` privileges. From here, we can begin the installation process.
First, update your package list to ensure you’re installing the latest version of Apache2:
sudo apt update && sudo apt upgrade -yNow, install Apache2:
sudo apt install apache2 -yStep 2: Create a Dedicated User and Website Directory
For security and organization, it’s a best practice to create a new system user for your website’s files and a custom document root (the folder where your website’s content will live). We will create a new user named `wwwuser` and give them access to a directory named after your domain, **it-india.net**.
- Create the directory for your website:
sudo mkdir -p /var/www/it-india.net/html - Assign ownership of the new directory to your user. Replace `[your_new_username]` with your username:
sudo chown -R $USER:$USER /var/www/it-india.net/html - Set the correct permissions for the directory:
sudo chmod -R 755 /var/www/it-india.net
To test that everything is working, create a simple `index.html` file in the new directory:
sudo nano /var/www/it-india.net/html/index.htmlPaste the following content, save (Ctrl+O), and exit (Ctrl+X):
<!DOCTYPE html>
<html>
<head>
    <title>Welcome to it-india.net</title>
</head>
<body>
    <h1>Success! The it-india.net website is live!</h1>
    <p>This is a placeholder page.</p>
</body>
</html>
Step 3: Create an Apache Virtual Host File
Apache uses virtual host files to manage configurations for different domains. This allows you to host multiple websites on a single server. We will create a new configuration file for **it-india.net**.
sudo nano /etc/apache2/sites-available/it-india.net.confPaste the following content into the file. The comments explain each line’s purpose:
<VirtualHost *:80>
    # Server Admin Email
    ServerAdmin webmaster@it-india.net
    # Main domain
    ServerName it-india.net
    # Additional domains and subdomains to include
    ServerAlias www.it-india.net
    # Document Root where your files are located
    DocumentRoot /var/www/it-india.net/html
    # Log files
    ErrorLog ${APACHE_LOG_DIR}/error.log
    CustomLog ${APACHE_LOG_DIR}/access.log combined
</VirtualHost>
Save and exit the file. Now, disable the default Apache site and enable your new site:
sudo a2dissite 000-default.conf
sudo a2ensite it-india.net.conf
Finally, test the Apache configuration for any syntax errors and reload the service:
sudo apachectl configtest
sudo systemctl reload apache2
Step 4: Make DNS Entries and Set Your DNS Servers
Now that your server is ready, you need to tell the internet where to find it. This is done by creating **A records** in your domain registrar’s DNS settings. Use the public IP address of your Google Cloud VM to create the following records:
- `A` record for `@` (your main domain) pointing to your VM’s public IP.
- `A` record for `www` pointing to your VM’s public IP.
If you’re using a custom DNS provider, you must change your domain’s nameservers at your registrar to point to them (e.g., `ns1.it-india.net`, `ns2.it-india.net`). DNS changes can take anywhere from a few minutes to 24 hours to propagate across the internet. You can use an online DNS lookup tool to check if the changes have been applied.
Step 5: Secure Your Site with Let’s Encrypt (SSL)
An SSL certificate is essential for security, trust, and search engine optimization. We’ll use Certbot to automatically get a free SSL certificate from Let’s Encrypt.
First, install Certbot and the Apache plugin:
sudo apt install certbot python3-certbot-apache -yNext, run Certbot for your domain. It will automatically find your Apache configuration and set up SSL:
sudo certbot --apache -d it-india.net -d www.it-india.netFollow the on-screen prompts. Certbot will handle the rest, including creating an automatic renewal process for you.
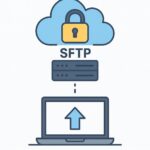
Step 6: Create an SFTP User for File Transfers
For managing your website’s files, you’ll need an SFTP (Secure File Transfer Protocol) user. This allows you to securely upload and edit files using a client like FileZilla or Cyberduck.
sudo adduser sftpuserFollow the prompts to set a password. For advanced setups, you can restrict this user to their home directory to enhance security.
Part 3: Stats
Apache remains a dominant force in the web server market, powering approximately **25.7%** of all websites, a testament to its reliability and vast community support. Its competitor, Nginx, holds a slightly larger share, which shows the diversity in the web development ecosystem. However, for a beginner, Apache’s ease of use and extensive documentation make it a top choice. The importance of security cannot be overstated: roughly 63.4% of all websites use a free SSL certificate from Let’s Encrypt, which has now issued over 1 billion certificates. Securing your site with an SSL certificate is a key factor in improving search rankings and building user trust.
Common pitfalls to watch out:
- Permissions Errors: Ensure your website files and directories are owned by the correct user and have the right permissions to be read by the Apache web server.
- DNS Propagation: Be patient. It can take time for your DNS changes to update globally.
- Firewall Configuration: Your Google Cloud firewall rules must allow traffic on ports 80 (HTTP) and 443 (HTTPS) for your website to be visible.
- Ensure UFW allows traffic on port 80 and 443
Part 4: The Takeaway
Congratulations, you’ve successfully deployed your first website on Google Cloud! By installing Apache, configuring your virtual host, setting up DNS, and securing your site with SSL, you have built a powerful, flexible, and scalable foundation. This process not only gets your website online but also provides you with invaluable skills in managing cloud infrastructure. This knowledge is the key to building and maintaining more complex applications in the future. Now that your site is live, what’s next? Will you install a CMS like WordPress, or build a custom application?
✍️ Need Content Like This?
We craft high-quality, SEO-optimized articles tailored for blogs, news sites, and educational platforms. If you enjoy thoughtful writing and open-source spirit, just buy me a coffee and I’ll write 1,000 words for you. Let’s build something meaningful together. Contact us to get started.