Building the Foundation for Dynamic Websites
The **LAMP stack**—short for Linux, Apache, MySQL, and PHP—is a timeless and powerful foundation for hosting dynamic websites and applications. It’s a robust, open-source combination that powers a significant portion of the web, from simple blogs to complex e-commerce platforms. Setting up a LAMP stack on a Google Cloud Virtual Machine gives you complete control over your environment, allowing you to tailor performance and security to your exact needs. This guide will walk you through the essential steps to get your LAMP stack up and running, transforming your fresh Ubuntu server into a fully-functional web hosting platform. We’ll build upon our previous guides, assuming you have a server in place, and focus on installing and configuring the necessary software components to bring your website to life. For a refresher on setting up your VM, you can refer to our guide: A Beginner’s Guide to Launching a Server on Google Cloud.
Step 1: Install Apache, The Web Server
First, we’ll install **Apache**, the “A” in LAMP. Apache is a highly reliable and widely-used web server that delivers your website’s files to your visitors. It’s the traffic controller of your server, handling incoming requests and sending out the correct responses. Begin by updating your package list to ensure you get the latest version, then install the `apache2` package.
sudo apt update
sudo apt install apache2 -y
Step 2: Enable & Start Apache
After installation, Apache isn’t automatically started on some systems. We need to ensure that it starts automatically when your server boots up and that it’s currently running. This guarantees your website is always online.
sudo systemctl enable apache2
sudo systemctl start apache2
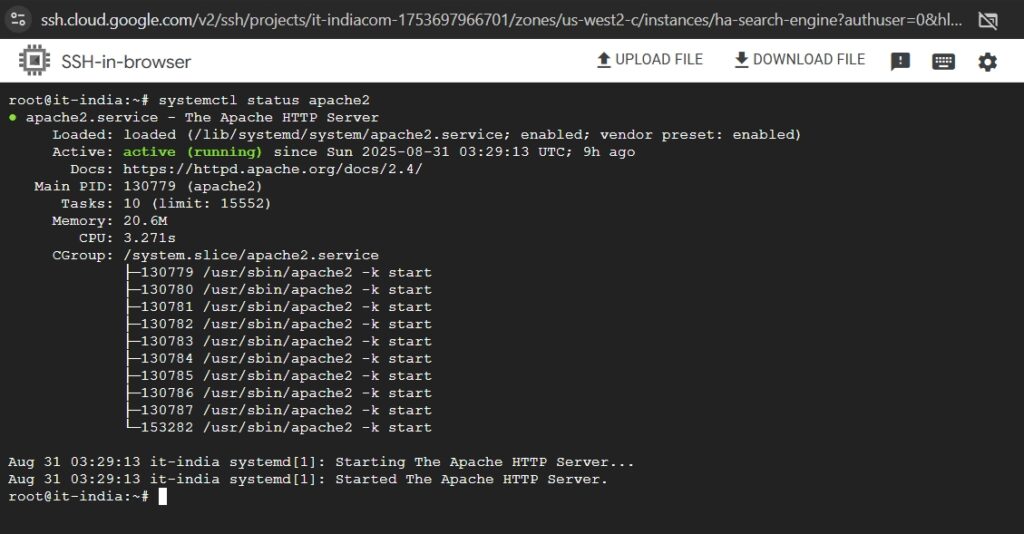
You can verify its status with the following command. You should see “active (running)” as in the image below if everything is working correctly.
systemctl status apache2
Once Apache is running, you’re ready to test if it’s accessible from the internet.
Step 3: Test Apache in Your Browser
To confirm that Apache is properly serving content, you’ll need your server’s public IP address. You can find this in your Google Cloud Console’s VM instances list, or by running a command on the server itself:
ip addr show
Alternatively, you can get the public IP using a simple command line tool:
curl ifconfig.meNow, open a web browser on your local machine and visit the IP address. If successful, you’ll see the default **”Apache2 Ubuntu Default Page”** which confirms that your web server is installed and publicly accessible.
Troubleshooting: Dealing with Firewalls
If you don’t see the default page, a firewall is likely blocking access. There are two places to check:
-
- **The Ubuntu Local Firewall (UFW):** You can check the status of Ubuntu’s firewall by running `sudo ufw status`. If it’s active, you need to allow inbound HTTP traffic.
sudo ufw allow 'Apache'
sudo ufw reload
- **The Google Cloud VPC Firewall:** Even if UFW is inactive, Google Cloud has its own robust firewall rules that block all incoming traffic by default. You need to create a rule to explicitly allow traffic on ports 80 (HTTP) and later, 443 (HTTPS).
To do this, navigate to **VPC Network → Firewall** in your Google Cloud Console. Create a new rule with the following settings: `Name: allow-http`, `Direction: Ingress`, `Targets: All instances`, `Source IP ranges: 0.0.0.0/0`, and `Protocols and ports: tcp:80`. For a more detailed guide, see our article on Google Cloud Firewall Policies. Once these rules are in place, your server should be reachable.
Step 4: Install PHP
Apache alone can only serve static HTML pages. To run dynamic content—like a WordPress blog or an e-commerce store—we need to install **PHP**. This will enable Apache to process PHP code and interact with your database. We’ll also install the Apache module for PHP and the MySQL extension that allows PHP to communicate with our database.
sudo apt install php libapache2-mod-php php-mysql -y
This single command installs the core PHP language, the module that integrates PHP with Apache, and a crucial extension to handle MySQL database connections.
Step 5: Test PHP with Apache
To confirm that PHP is correctly integrated, we’ll create a simple test file containing the `phpinfo()` function. This function displays a detailed breakdown of your PHP installation and configuration. While this is a useful troubleshooting tool, it’s a major security risk if left on a public server, so we will remove it immediately after testing.
echo "<?php phpinfo(); ?>" | sudo tee /var/www/html/info.php
Now, open your browser and navigate to `http:///info.php`. If you see the detailed purple PHP info page, you’ve successfully integrated PHP with Apache.
Step 6: Secure and Clean Up
For security, it’s critical to remove the `info.php` test file. A malicious user could use the information on that page to find vulnerabilities in your server’s configuration. Run the following command to remove it:
sudo rm /var/www/html/info.php
Now that your LAMP stack is functional, you can delete that test file and continue. For more details on MySQL, you can refer to our article on how to manage a MySQL database.
Stats & Pitfalls – The Importance of a Solid Stack
The LAMP stack is a proven and resilient combination. Statistics show that around **60% of websites** with a known server-side programming language use PHP, and Apache continues to power a significant portion of all web servers, a testament to its stability and performance. The primary pitfall for beginners is neglecting the Google Cloud firewall, which is a key security feature. Another common mistake is not fully securing the MySQL installation after setup, which can leave it exposed to the internet. To prevent this, always ensure you have a dedicated user for your MySQL database and have a robust firewall configuration in place, as outlined in our other guides. Always remember that security is a continuous process, not a one-time setup. To stay updated with the latest in cloud innovation, follow Google Cloud on their official X/Twitter account.
The Takeaway – The Power of a Complete Stack
Congratulations! You have successfully deployed a complete and functional LAMP stack on your Google Cloud server. You’ve installed Apache to serve your website’s content, integrated PHP to handle dynamic processes, and ensured that everything is running smoothly. This robust foundation empowers you to host a wide range of applications, from personal blogs to business websites. The knowledge you’ve gained from this process is invaluable, providing you with the skills to confidently manage a powerful web hosting environment. Now that your stack is ready, you can proceed to install a CMS like WordPress or deploy your own custom application.
✍️ Need Content Like This?
We craft high-quality, SEO-optimized articles tailored for blogs, news sites, and educational platforms. If you enjoy thoughtful writing and open-source spirit, just buy me a coffee and I’ll write 1,000 words for you. Let’s build something meaningful together. Contact us to get started.